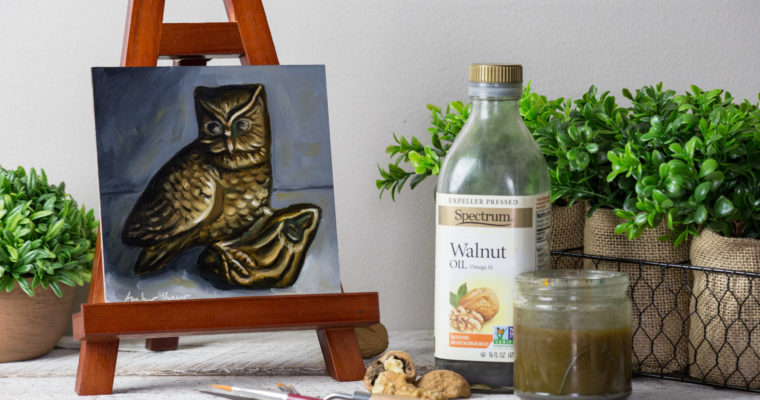
It has been a year now since I first began my little experiment to use walnut oil to clean my brushes. My goal was to get away from the tedious task of standing at the sink for ages to clean my brushes. In that, I have definitely succeeded. Using this method has changed how I paint for the better and I can’t see myself going back to using solvents.
To read more about using walnut oil to clean, read Using Walnut Oil to Clean and Store Oil Paint Brushes. In that post I go over my method and tools.
Benefits:
1. Quick and easy cleaning of brushes during and after painting. I keep my brushes cleaner while working and don’t have to use as many brushes during a paint session. Cleaning a handful of brushes at the end of the day only takes a few minutes. I was washing brushes for 10-20 minutes after each painting session and this method has completely eliminated that chore. Plus, if I have to really quickly clean up, I can put my dirty brushes in oil and clean them later.

2. No fumes to ventilate or lose brain cells to. Solvents have really bad health effects. I read somewhere that everyone is allergic to turpentine. If you aren’t showing signs now, you will eventually. I can paint with my kids and animals in the room and not worry about everyone’s health and safety like I would if the room contained dangerous fumes.
3. It prevents oil from drying and building up at the base of the ferrule, splaying out the bristles. The cheap 12-pack of brushes I bought for the experiment seemed to last decently long. It was roughly 9 months before I decided to replace them. The ends were frayed and worn from use and it was becoming more difficult to create fine details. One huge thing I noticed though, was that they were all still in good condition where the bristles meet the ferrule. I’ve had a problem in the past of buildup right there causing brushes to fan out and no longer form a point or sharp edge. I call those damaged brushes mops and they can be useful, but I only need one or two.

4. Non-toxic. It’s just oil. However, many pigments contain hazardous materials such as lead, arsenic, and other heavy metals, so used oil is therefore a hazardous material and should be disposed of properly. If you go out of your way to use only non toxic paints, then the process is entirely non-toxic. I however, love to use the cadmium colors so I handle all of my paints as though they’re toxic to maintain good habits.
Downsides:
1. Lots of oil soaked rags. Keep in mind that oil soaked rags can spontaneously combust due to the heat oil produces when drying. They’re not really a big deal if you handle them properly which you should already be doing. Store wet rags in a metal container with a tight-fitting lid and dispose of them as hazardous waste at your local waste collection agency. The tight-fitting lid on the metal container stops the oxidation process from happening and effectively stops the oil from heating up. I use an all metal empty paint can that I got from a hardware store for a couple of dollars. Never leave oil soaked rags in a pile or dispose of them with your regular trash.
Read Fire Safety Guidance for Oily Rags. The article is focused on more industrial situations, but the information applies to artists working in their homes and studios. It also lists several examples of oil soaked rags as the source of devastating fires.

2. Once you start, you can’t stop using this method for your brushes and not because it’s just that awesome. The oil soaks way up into the bristles inside the ferrule and once you wash them and let them dry, that oil seeps down and hardens your brush. The only brushes this method ruined were the ones I washed a let dry. If you wash your brushes every day, this may not be as big of an issue. I however, only washed brushes once in the last year and see no point in ever doing it again.
3. Gummy oil build up on brush ferrules, cleaning container, and brush holder. Not really a big deal. Mess is a part of the painting game.

4. The lack of solvents mean no washes on the first layer. This isn’t an issue for me since I stopped doing it long before giving up solvents completely. I never liked handling solvents and couldn’t ever get enough ventilation to feel safe about covering a whole canvas with it. I don’t really care about having a toned ground and even prefer to paint on a bright white surface. If you do want a toned surface, paint you canvas with paint thinned with medium and wipe it off. I inadvertently tone my canvas this way if I do a sketch that I wipe off so I can start painting immediately.
Discoveries:
1. I have a nice grey pigment settled at the bottom of my dirty oil. I’m considering separating it from the oil and using it. There is probably enough to fill a 37ml tube. I suspect it’ll be a messy process and I’ll need to buy a glass muller to properly mix the paint but I could consider it my very own Torrit Grey. If I can successfully filter out enough oil so it isn’t a liquid I’ll do a post on it.

2. Pigment settles to the bottom and the oil can be poured off and reused over and over again just like solvents. I’m still using the same oil I started with a year ago. Although, a lot has been lost over time to paper towels and that one time I spilled a bunch so I bought a second bottle of oil. One or two bottles of cheap walnut oil a year is very affordable.

3. Brushes forgotten in oil are perfectly fine for at least three weeks. I once or twice left brushes for 3 weeks before checking on them. They were just as good as when I stopped using them. Brushes left out on the table over night were also fine, but thereafter quickly started to harden. I don’t recommend leaving them out overnight it can quickly turn into a few days and then you’re desperately trying to save a pile of hardened brushes. Ask me how I know this. Quick tip: working hardened brushes in the oil cleaning jar softens them up and makes them usable again.

4. It isn’t necessary to use walnut oil specifically marketed for artists. I used a walnut oil I bought from the grocery store and I didn’t have any issues with any of my paintings not drying or anything weird happening over time. The first painting I finished over a year ago using only this cleaning method still looks as good as the day I finished it.
The Bottom Line
I highly recommend this method of cleaning brushes. It’s quick, cheap, effective, and safer than using solvents. I haven’t used any solvents in over a year and see no need to use any in the future.


Leave a Reply